Tuesday, September 13, 2011

Coloring Contest/Birthday Party

My dear little artist/party planner was telling me several months ago how she wanted to host a coloring contest. She had it all planned out. It seemed like a lot to do for "no reason" but along came her birthday and I thought A-ha! Thanks to the wonderful world of Pinterest I had all the inspiration I needed at my fingertips.

For decorations I started with a $1 pack of colorful construction paper, half of which went to creating these fun zigzag streamers in our entry. Another $1.99 on balloons which we strung up and taped to the walls, I happened to have mono-filament, a needle, and tape. Too easy. The rest of the decor was provided by our guests as they completed the activities. The other half of the construction paper was cut into strips and set up at a paper chain making station which was surprisingly well liked by our guests for being such a simple idea! They had fun making the chains as tall as themselves then connecting with their friends to make a super chain which we hung from the curtain rods. We also filled a blank wall with each guests' completed coloring page then asked them to draw a self portrait and fill out a very short artist survey to hang beneath their coloring page. There were two strands of balloons like this also in the dining room (not pictured).


For refreshments I had quite the fun creating an assortment of rainbow colored snacks! I started with a big trifle bowl of rainbow slush which was easy to create for a grand total of $2.50, using just one big pack of ice pops. Next were the rainbow dipped marshmallows pops. I simply melted a square of Baker's White Chocolate, added Wilton gel food coloring then dunked the bottom of each marshmallow and dipped them in white sprinkles. I could do 8 marshmallows with just one ounce of chocolate (x 6 colors = 48 treats). The lollipop sticks were about $3 for 150. Then came the fun of creating rainbow candied popcorn. It involves inexpensive microwave popcorn + Karo syrup + sugar + Jell-O! (Beware the Jell-O colors might not turn out quite like you expect them too. The "purple" blackberry was almost indistinguishable from the red strawberry and the lime was very pale green not bright like I wanted.) Finally I created a rainbow assortment of fresh fruit: strawberries, cantaloupe, pineapple, kiwi, and purple grapes. Then rounded out all those sweets with some pretzels and a veggie tray. The table cloth and polka dot cups were clearance finds at Target and Party City respectively (it pays to know your theme in advance and keep an eye out for these things).


We told our friends there would be "prizes" for the coloring contest. I was thinking gold medals or little trophies but turns out those were more expensive than I thought. Instead I made prize ribbons using the "draw circle" feature on Word and adding text. Those circles were cut out and inked around the edges then glued onto larger circles cut with the Cricut then a pretty rainbow ribbon was stapled on. We went the diplomatic route and came up with 15 clever categories so everyone was a winner. Then we simply renamed the "goodie bags" as "prizes". (Yes she gave herself "fanciest").


And finally the biggest surprise of all - The Six Layer Rainbow Cake! You can find the recipe here. I originally loved the look of it and didn't even realize that it also involves a different flavor for every layer. Glad I read the details before I did the grocery shopping. I was able to complete the baking and icing between the layers while she was at school on Friday. I did not tell her nor any of our birthday guests about the big surprise inside. She did discover one of the surprises before the big reveal but it was just the Rainbow Nerds on top. She had no idea about the inside. We were frosting the outside about 30 minutes before the guests arrived as she watched a show in the other room. David & I sure had a hilarious time pelting those Nerds at the frosted cake and couldn't help laughing as they skittered all across the kitchen floor. I'm sure we'll be finding them under the appliances when we move. Nerds happen to be her favorite candy so I thought it only fitting to use them as the "sprinkles."


When we cut the cake open, I could not have guessed the reaction. I only wish we had caught it on video. Every kid in that room literally SCREAMED when they saw the rainbow inside! Priceless.


And yes we had one very happy birthday girl!!

(Isn't the dress just perfect? Grandma got it from Avon before the party was even planned!)


Tip Junkie handmade projects
Find 100s more creative, amazing Ideas at the Tip Junkie link party!

Sunday, August 28, 2011

Coloring Contest Birthday Invites

About three months ago Cali started telling me that she wanted to host a coloring contest. She went into all the details of how she would invite all the friends and neighbors and award them prizes and have snacks for them and on and on. It sounded fun and all but also a lot of work to do "just because." Well now her birthday is coming up and I've seen so many fun art themed party ideas online and I thought she would just love an art party. Then I remembered her coloring contest idea and thought a-ha! So she is going to have her coloring contest as her birthday party!

Here are the clever invitations we came up with.

First I went into Word and created the invitation using a little clipart and changing the font colors for each section. The border was done by layering increasing sizes of the rounded rectangle shape. Just change the background to "none" and keep changing colors and increasing the size of each shape.

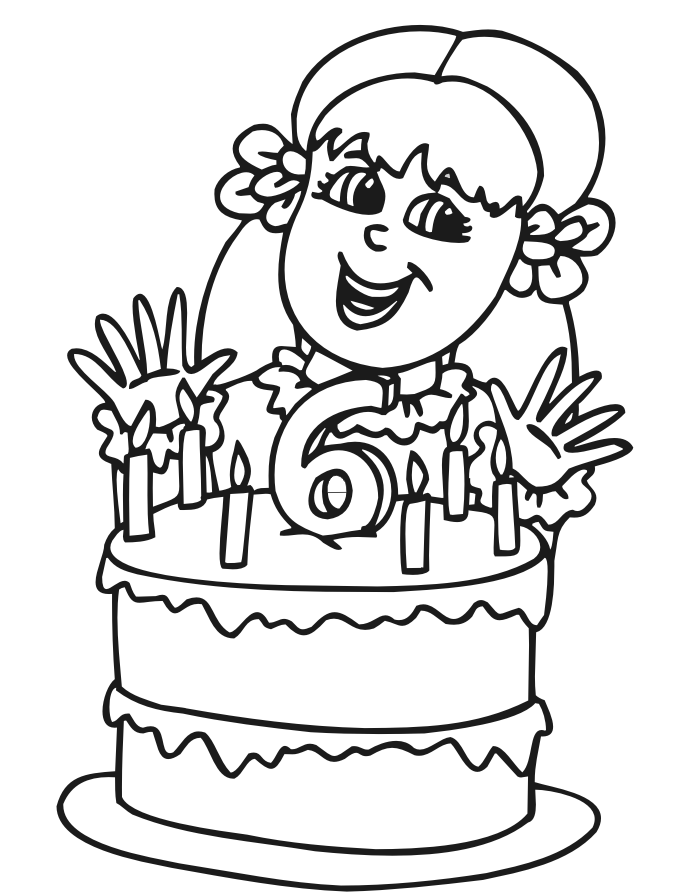
We also did a Google Image search for "girl birthday six coloring page" and found the perfect coloring page for each guest to color for the contest.

Now with school just starting and all those papers piling up on the kitchen counters I thought I needed a special place for our guests to keep and protect their precious coloring pages so they don't get lost or damaged before party time. This also helps for the families who have more than one child attending, so some folders have two coloring pages inside. I picked up some brightly colored file folders for a couple dollars to complete the ensemble.

So that's it, just a homemade invite, paperclip, folder, and coloring page. Can't wait to see the colored pages when our guests arrive!

More on the party coming up next, including the homemade award ribbons and party treats.

Tip Junkie handmade projects
For 100's more clever, crafty, creative ideas check out Tip Junkie's Tip Me Tuesday!

Tuesday, June 7, 2011

Perfectly Imperfect Picnic Quilts


I do not proclaim to be a seamstress, much less a quilter but even so I thought I'd like to treat my kids to their very own picnic quilts. The type of quilt that is rugged and expected to get dirty, not an heirloom to hang on the wall or even to snuggle up with in bed. I have a fantastic heavy quilt made by my Granny that I use just for this purpose, to throw on the ground and have a seat close to the good green grass... to read a book, stare at the clouds or enjoy a meal al fresco. My quilt is quite large and there is just one, I often keep it in the trunk of my car, it is not accessible or practical for everyday use by the children.


Also, I noticed the kids trying to lay on the deck recently on their soggy towels. Something about wet towels being dragged through grass and dirt just irks me. This is why I decided I would assemble in some way, shape, or form a quilt of their own. One that is meant to be thrown on the ground and dragged around, although hopefully not thrown into the pool. We shall see.

I started with a dig through my meager fabric bin and was happy to find a huge piece of durable khaki material plenty large enough for two quilts. I took an opportunity to leave the kids with Dad and set off for the fabric store kid-free!! I let my eyes stray from the clearance racks to the oh-so-adorable prints lined up row after row across the store and let the cuteness get the best of me. A few calculations and a few too many dollars later I had my fabric. I also perused the batting and settled on a Queen size sheet of fusible batting that it said I could iron together and save me lots of time. Oh, and don't forget the binding, enough to finish off all the edges.

Now when I say this is a quilt I don't mean I cut up a bunch of squares and put them together in some interesting unique pattern. Not at all. I simply got one piece of fabric as large as would fit on my durable khaki backing. With the fabrics all washed and cut to size I proceed to iron the batting between the fabrics according to the package instructions. To my great surprise it actually worked and was a fairly easy, painless process.

Now with my fabric and batting sandwich all fused together, I took a 2" quilters square (it came free with my batting) and marked off every 2 inches from each corner. I used a sharpie and just put a dot right at the edge of the fabric, knowing this would be covered later by the binding.

Now to the "quilting" part. I wanted to sew diagonal lines using my marks as guides to form a diamond quilted pattern. So I counted two dots down from the corner, and two dots to the left of the corner and sewed a line from one point to the other. Then I would count two dots down or across from the last line I had sewn. You will do this all around the quilt until eventually it is all "quilted" up. The longer the lines, the trickier it gets to keep a straight line, just try your best! I have known my whole life I am not the person who is capable of cutting, drawing, or sewing straight lines. That is ok. It might look like these lines were sewn by a drunken kangaroo, but they were made with LOVE and that's all that matters.

Once all the "quilting" is done, you may need to trim around the edges to get everything nice and square and lined up where no one fabric is sticking out more than the other. Now you can put on the binding, I used a double fold bias tape (or something like that ) and carefully held it on around the edges and sewed it with a zigzag stitch. Did I mention I never use any pins when I sew? I had to use two packages of binding and just made sure to do an inch or so overlap where I attached the next piece.

I hope some of this makes sense, and although its not the most helpful tutorial I hope you are at least inspired to try something new and have the courage to just take your next project one step at a time and forget about perfection. Just make it with love and it will turn out just fine.


Have a Ball!

Tip Junkie handmade projects
If you watch closely you can usually score really cheap deals on seasonal items that the stores put on clearance after the big day. If you're willing to dig through some of the junk you can even find items that really aren't so "seasonal" and you can stash them away for your next birthday party goodie bags or other occasion that is sure to come up. I waited long enough that these "Easter" balls were 90% off and came to about 10 cents per ball! I thought they'd be a nice end of school gift for Cali's preschool classmates.

I simply went on MS Word and typed up a little note. I definitely wanted to use the phrase "Have a ball this summer!" Cali actually objected! Oh well, she is only 5 I still get a say in this :) We also added "It was fun being your friend" and "Have fun at Kindergarten next year!" And you can see I had her write her friends' names and sign her own at the bottom. They are wrapped in the flip top plastic baggies with the tag stapled on. Just an easy-peasy fun surprise to say goodbye to her pre-school friends, many of which will be at different schools next year.


Friday, June 3, 2011

Lunches & Snacks

A grown-up lunch! Turkey pastrami, spinach and mustard on an Everything Bagel Thin, tomatoes to add before eating, bottom of the bag Sun Chips, string cheese.

Kid lunches, served as a backyard picnic. Tuna salad (by request!), low fat Ritz, crinkle cut cucumbers, fresh strawberries with chocolate sprinkles. My tuna salad includes Olive Oil Mayo, chopped dill pickle, black pepper, and feta cheese.

Lunch for one, served at the table. Turkey pastrami, string cheese pre-strung because he likes that, pretzels, baby spinach leaves (aka bunny leaves), watermelon.

New suppplies to use: forks from Michaels and turtle silicon cups from HL. Triple decker PB, honey & banana (because I only had 3 slices of bread), cheese, cucumber cubes, Cara Cara orange, Scrabble Cheez-Its.

Once a week we go straight from school pick-up to library to gym and ballet before coming home, these are the days we need a healthy snack in the car.

Favorite apples, goldfish, cheerios mixed with bits of dried pineapple. They had both asked for dried pineapple recently so they were pleasantly surprised by this snack.

Apples, goldfish, and homemade "Powerballs." Powerballs are a mix of PB, honey, flax seed, oats, white chocolate chips and dried pineapple. These were a big hit! I will post the recipe in the near future.

Apples, Powerballs, graham crackers.


Green Tea Limeade

This drink has been so refreshing on the hot "summer" days we've been having already. There was a more complex version in Taste of Home magazine, but this is my very simple recipe.


Green Tea Limeade

1 can frozen limeade concentrate
4-6 green tea bags
water

Set out the frozen limeade concentrate while you make the tea. Heat 4 cups of water to boiling (I use the microwave), steep tea bags 2-5 minutes. Empty limeade (it can still be frozen) into a 2 quart pitcher, pour prepared tea over limeade, add more cold water to fill pitcher. Mix and enjoy over ice.

I use decaf tea so my kids can enjoy the drink too, they love it! And as a grown-up, if you're so inclined its quite qood with a splash of tequila.

Wednesday, May 18, 2011

Garden Recipes

With all the things we've been harvesting from the garden, I've been researching new recipes to try and use them up. I didn't have to look much further than the Food Network website.

First, I made this delicious Sausage-Cauliflower Spaghetti. I had made this once before, but this time I got to use my very own homegrown cauliflower so it was even better. This is a kid friendly dish in my house because the kids love spaghetti and sausage so I'm only throwing in one ingredient they might not love. I just cut the cauliflower nice and tiny and hope some ends up in their mouth. D has recently decided that he does like cauliflower but I'm still working on Cali.

My next challenge was to figure out what to do with my surplus of radishes, especially since the one person who eats the most radishes had been out of town. I really don't like them much at all, but I do like growing them because they are so easy! Plus I found some really pretty mixed color ones (pictured here). The kids eat some radishes, but still we had a surplus. I thought it would be fun to try these Quick Pickled Radishes by Bobby Flay.

Here is my version of his recipe, his called for an entire quart of vinegar & 4 bunches of radishes... I didn't want that many pickled radishes.

Pickled Radishes

3/4 cup salad vinegar
1/4 cup red wine vinegar
1/4 cup white sugar
2 tbsp pickling spice
1 clove smashed garlic per jar
Sliced red onion (optional)

Clean radishes and cut to desired size. Combine ingredients of pickling liquid in a sauce pot and bring to a boil. Arrange radishes, garlic and onion in jars. Pour boiling liquid over radishes and put on lids. Allow to cool to room temperature before refrigerating.*

*This is what I did, but as I re-read the recipe I see that Bobby says to pour off the liquid and serve when it is cooled. Maybe that is why mine were SO powerful by dinnertime. Funny enough, I made everyone else try them first (since I don't even like radishes) and they said "Whoa these are strong!" Well I happen to LOVE vinegar so I actually did like them! Also, the original recipe called for Champagne vinegar which I didn't find, maybe it isn't as strong as what I used.

Finally, I found a delicious new use for cabbage! I do like coleslaw, but figured by the time I bought carrots and purple cabbage to mix with my own cabbage that would defeat the purpose of using what I have available. I found a recipe for Grilled Cabbage in a Taste of Home magazine.

Here is my version...

Grilled Cabbage

2 small cabbages, washed and cut into wedges
5 strips center cut bacon
1 tbsp butter, softened
Sliced red onion, to taste
Pepper, to taste

Start cooking bacon and preheat grill. As bacon cooks, arrange cabbage wedges and sliced onion on a large sheet of foil, spread with butter, sprinkle with pepper to taste. When bacon is done place on top of cabbage and drizzle bacon grease on top. Wrap tightly in foil and place on the grill. Grill, covered, over medium heat for 20 minutes or until tender. Open foil carefully to allow steam to escape.

Dave and I really enjoyed this recipe and ate a great big helping of it. I left out the salt and reduced the butter since I added bacon. The kids nibbled the bacon but said they didn't like "cooked lettuce." Cali said she would eat cabbage if I didn't cook it next time.