Showing posts with label crafts. Show all posts

Sunday, August 28, 2011

Coloring Contest Birthday Invites

About three months ago Cali started telling me that she wanted to host a coloring contest. She went into all the details of how she would invite all the friends and neighbors and award them prizes and have snacks for them and on and on. It sounded fun and all but also a lot of work to do "just because." Well now her birthday is coming up and I've seen so many fun art themed party ideas online and I thought she would just love an art party. Then I remembered her coloring contest idea and thought a-ha! So she is going to have her coloring contest as her birthday party!

Here are the clever invitations we came up with.

First I went into Word and created the invitation using a little clipart and changing the font colors for each section. The border was done by layering increasing sizes of the rounded rectangle shape. Just change the background to "none" and keep changing colors and increasing the size of each shape.

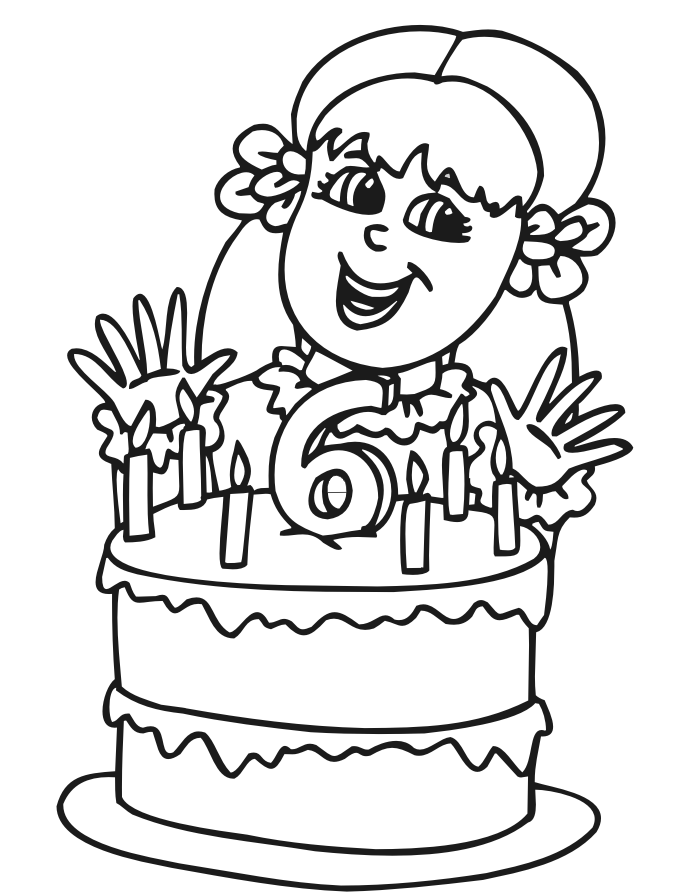
We also did a Google Image search for "girl birthday six coloring page" and found the perfect coloring page for each guest to color for the contest.

Now with school just starting and all those papers piling up on the kitchen counters I thought I needed a special place for our guests to keep and protect their precious coloring pages so they don't get lost or damaged before party time. This also helps for the families who have more than one child attending, so some folders have two coloring pages inside. I picked up some brightly colored file folders for a couple dollars to complete the ensemble.

So that's it, just a homemade invite, paperclip, folder, and coloring page. Can't wait to see the colored pages when our guests arrive!

More on the party coming up next, including the homemade award ribbons and party treats.

Tip Junkie handmade projects
For 100's more clever, crafty, creative ideas check out Tip Junkie's Tip Me Tuesday!

Tuesday, June 7, 2011

Perfectly Imperfect Picnic Quilts


I do not proclaim to be a seamstress, much less a quilter but even so I thought I'd like to treat my kids to their very own picnic quilts. The type of quilt that is rugged and expected to get dirty, not an heirloom to hang on the wall or even to snuggle up with in bed. I have a fantastic heavy quilt made by my Granny that I use just for this purpose, to throw on the ground and have a seat close to the good green grass... to read a book, stare at the clouds or enjoy a meal al fresco. My quilt is quite large and there is just one, I often keep it in the trunk of my car, it is not accessible or practical for everyday use by the children.


Also, I noticed the kids trying to lay on the deck recently on their soggy towels. Something about wet towels being dragged through grass and dirt just irks me. This is why I decided I would assemble in some way, shape, or form a quilt of their own. One that is meant to be thrown on the ground and dragged around, although hopefully not thrown into the pool. We shall see.

I started with a dig through my meager fabric bin and was happy to find a huge piece of durable khaki material plenty large enough for two quilts. I took an opportunity to leave the kids with Dad and set off for the fabric store kid-free!! I let my eyes stray from the clearance racks to the oh-so-adorable prints lined up row after row across the store and let the cuteness get the best of me. A few calculations and a few too many dollars later I had my fabric. I also perused the batting and settled on a Queen size sheet of fusible batting that it said I could iron together and save me lots of time. Oh, and don't forget the binding, enough to finish off all the edges.

Now when I say this is a quilt I don't mean I cut up a bunch of squares and put them together in some interesting unique pattern. Not at all. I simply got one piece of fabric as large as would fit on my durable khaki backing. With the fabrics all washed and cut to size I proceed to iron the batting between the fabrics according to the package instructions. To my great surprise it actually worked and was a fairly easy, painless process.

Now with my fabric and batting sandwich all fused together, I took a 2" quilters square (it came free with my batting) and marked off every 2 inches from each corner. I used a sharpie and just put a dot right at the edge of the fabric, knowing this would be covered later by the binding.

Now to the "quilting" part. I wanted to sew diagonal lines using my marks as guides to form a diamond quilted pattern. So I counted two dots down from the corner, and two dots to the left of the corner and sewed a line from one point to the other. Then I would count two dots down or across from the last line I had sewn. You will do this all around the quilt until eventually it is all "quilted" up. The longer the lines, the trickier it gets to keep a straight line, just try your best! I have known my whole life I am not the person who is capable of cutting, drawing, or sewing straight lines. That is ok. It might look like these lines were sewn by a drunken kangaroo, but they were made with LOVE and that's all that matters.

Once all the "quilting" is done, you may need to trim around the edges to get everything nice and square and lined up where no one fabric is sticking out more than the other. Now you can put on the binding, I used a double fold bias tape (or something like that ) and carefully held it on around the edges and sewed it with a zigzag stitch. Did I mention I never use any pins when I sew? I had to use two packages of binding and just made sure to do an inch or so overlap where I attached the next piece.

I hope some of this makes sense, and although its not the most helpful tutorial I hope you are at least inspired to try something new and have the courage to just take your next project one step at a time and forget about perfection. Just make it with love and it will turn out just fine.


Have a Ball!

Tip Junkie handmade projects
If you watch closely you can usually score really cheap deals on seasonal items that the stores put on clearance after the big day. If you're willing to dig through some of the junk you can even find items that really aren't so "seasonal" and you can stash them away for your next birthday party goodie bags or other occasion that is sure to come up. I waited long enough that these "Easter" balls were 90% off and came to about 10 cents per ball! I thought they'd be a nice end of school gift for Cali's preschool classmates.

I simply went on MS Word and typed up a little note. I definitely wanted to use the phrase "Have a ball this summer!" Cali actually objected! Oh well, she is only 5 I still get a say in this :) We also added "It was fun being your friend" and "Have fun at Kindergarten next year!" And you can see I had her write her friends' names and sign her own at the bottom. They are wrapped in the flip top plastic baggies with the tag stapled on. Just an easy-peasy fun surprise to say goodbye to her pre-school friends, many of which will be at different schools next year.


Wednesday, March 2, 2011

Photo Re-Cap: November

To make up for my long hiatus I will do a quick photo recap of each month I missed out on.

The end of the kids' first soccer season.
My parents made the long trip down from Alaska to visit us and see our new home. We made sure to put Dad to work while he was here too. He helped finish the huge treehouse, helped us cut down three pine trees, (one of which was used to frame a sandbox) and we built a fire pit which has already been enjoyed many times for backyard hot dog & s'mores nights. Granny & Papa even treated the kids to an early Christmas present and bought the slide for the end of the treehouse.

Before they headed back North, my parents couldn't leave here without visiting the beach at least once! We headed for Myrtle Beach and had the most beautiful day for it. Beach was practically empty other than a few walkers. I didn't quite bring the right clothes for the kids (it was Novemeber after all!) and they are such magnets to water that they ended up head to toe soaking wet and little D even ended up down to his undies most of the time. Unfortunately Dave had to work this day but it is definitely on our to-do list to take him down there as soon as the weather is nice enough again.
Thanksgiving Day we were thankful to have our dear friends here invite us over for the big meal. I made some sides and desserts but we also had time to just spend as a family. I had bought a bag of mixed beans and we all made hand turkeys.

And just because we all looked nice for Thanksgiving dinner, I made everyone sit on the porch for a family picture before we went over to our friend's. This ended up being our Christmas card photo this year. It makes me laugh because Cali's shoe had fallen off and she spent the whole time trying to put it back on but she looked at the camera and smiled anyway. (I use the self-timer and set it to take 10 photos in a row).

Sunday, May 9, 2010

Make Wonton Chips


You Will Need:

wonton wrappers (found in produce section)
various cooking oils
spices/seasoning mixes
cookie cutters
pastry brushes

We used the following combos of flavors:

  • olive oil and garlic bread seasoning
  • meyer lemon oil and parsley
  • canola oil and Ranch dressing powder
  • canola oil and cinnamon with a pinch of sugar

1. Cut individual wontons with cookies cutters, to your heart's desire. You may want to cut scraps into simple shapes also.
2. Combine small amounts of cooking oil and seasoning in a shallow bowl and use pastry brush to coat one side of each "chip".


3. Arrange "chips" on a baking sheet and bake at 400*F for 4 minutes or until lightly browned.
4. Remove from oven and let cool. Enjoy!


We had a lot of fun with the process, but the chips themselves were just "ok".... the kids wanted to eat them when they were fresh out of the oven but the novelty wore off by the time I had the kicthen all cleaned up. I would recommend this as a great sit-down activity and not for the quality of the end product.

Thursday, April 15, 2010

One Scrappy Gift

I posted this on my favorite Scrapbooking website, where it got rave reviews so I wanted to share it here also. This was for Vanessa's new scrapbooking room but you could easily make it for a child's room also.

It was made simply by creating a rainbow of scrap papers, rough cut, no measuring necessary. And I really wanted to impress her so I even got out the sewing machine and stitched across each row. The sign on hers says "My Scrappy Place".

Sunday, March 28, 2010

Scrappy Monogram

You may have seen this sneak peek photo on my Shuttercal yesterday...


We had all sorts of fun things to do this weekend but instead I woke up to Diego throwing up in my bed at 7am Saturday morning. Luckily I had the makings for a project I had bought earlier in the week to keep us occupied at home.

To do this project you will need:

Mod Podge or something like it
Paintbrushes of some sort
Scraps of paper (always plenty of those in my scrapbooking stash)
A wooden letter of your choice

Simply apply Mod Podge adhesive with a paintbrush and arrange small scraps of paper as you like. You may want to check for wrinkles in the paper and smooth those out as you go. Work in small sections until you have your letter completely covered. Paper sticking over the edges is fine, you can trim it later. When you're done gluing the papers down go over the whole surface again with at least one layer of Mod Podge. Allow to dry completely, flip the letter over and use a cutting and razor blade to trim away excess paper from edges. Now go hang your masterpieces!

Saturday, March 20, 2010

Free Art

I sure love a good deal! Can you believe the things people are willing to toss into a dump? Found this on the curb, asked the lady who was packing up a U-Haul if it was broken and she said "No, just needs to be cleaned up." Sold! In less than 10 minutes I had wiped it down, scraped off the stickers, magic-erased some marks, and cleaned the tray with soap & water. Cali has already created 3 masterpieces. This is the 3rd one pictured, that figure toward the top is "Daddy doing ballet!"

Friday, March 12, 2010

Strawberry Spider Treats


You will need...

Fresh Strawberries
Pretzel Sticks
Chocolate, melted

Wash strawberries, dry thoroughly, remove tops and cut each berry in half. Have your assistant arrange pretzel sticks in groups of 4 on a wax paper lined baking sheet. Dip the flat cut side of a strawberry in melted chocolate and set on top of pretzel sticks, centered so you now have 8 legs (4 sticking out on each side). Repeat until you use up all the strawberries. I had to use a fork to do this part well. If you have extra chocolate enjoy at your leisure :) For the eyes we used black writing frosting and some round flat sprinkles. You could also use mini chocolate chips. Refrigerate for a bit to harden the chocolate, and enjoy eating your delicious spiders!

Friday, February 5, 2010

Rainy Days

Cloudy, rainy, windy, wet and cold... not the weather we're used to in TX but that's how its been all week. We've been home and inside a lot more than usual pulling out everything from puzzles, to play-doh, to paint. All the things that we don't do as often when its nice and sunny out.

Thursday, January 28, 2010

I've Been Sewing

When I'm not at my computer desk in the evenings, I'm often right over here at my scrap desk...

I do think I could win a prize one day for World's messiest scrapbooker. Well, last week I got really inspired by all of these links and grabbed my sewing machine for a little experimenting. Before you go any further I have to warn that I am terrible at sewing, I know how to physically work the machine and that's about it. Its not for my Mom's lack of trying though, I just never took her up on offers to learn how. Now I wish I had! Instead I learned from my husband who learned from the Army, of all things!

First I was really eager to try this sweater dress made from a $3 Goodwill sweater. It turned out pretty ok, but I was terrified of the whole sleeve process. I just tried it anyway and they look decent but are too tight. She tried it on for me but hasn't worn it again, I will have to re-do the sleeves somehow.

Next I found this El-Cheapo Shirt Challenge and loved this easy Treasure Pocket Skirt. I actually would still wear this shirt but probably shouldn't its shapeless and baggy and faded. So I chose to make Stacy & Clinton proud and just cut it up. I thought it would be too short for my long-legged girl so I added some scrap fabric to the bottom for extra length. I keep thinking I want to add some kind of trim where the pink is attached to hide my terrible sewing. She loves this one and has worn it around the house quite a bit, so much that I already had to wash it twice.

And last was the easiest and my favorite of all. This was a shirt I got at Wal-Mart last summer for maybe $5. I must have been in some kind of colorful mood that day. I do love pink and brown. I may have worn it once. Since it already had a great shape to it and a nice embroidered collar detail I simple cut in on the sides and the neck to size it down for a Cali-size dress. Later in the week I even got adventurous enough to make Barbie a matching dress from the scraps.

I let Cali use my bathrobe the other day and now she wants one of her own (because it keeps her tummy warm), so maybe I'll try this next.

Thursday, January 21, 2010

New Ideas

Just stumbled on an amazing list of crafty ideas at Blue Cricket Design. Each Wednesday she hosts a "Show & Tell" where nearly 200 crafty bloggers share what they've created that week.

So far..
I'd really love to try this girl's sweater dress.. was very impressed by this monster shirt and this Lego table and this art tote. These little mice would make adorable Valentine's treats. I would have never thought to do this and I'd love to try this with some unwanted DVD cases.

Ok I'm off to rifle through my old sweaters...

Monday, January 18, 2010

Scrap Rendez-vous

My wonderful friend Alexandra is welcoming everyone to join in her fun Scrap Rendez-Vous challenges. This month (from Jan 15th to Feb 14th) you simply need to alter something.. anything.. just make sure to use your scraps. I really liked her scrapbooking sketch book so I picked up a blank journal on clearance at B&N today (for $2.02) and made it my own. The fun, rainbow background was existing. I added handcut letters, buttons, and rub-ons. The quote at the bottom says "Wherever you go, no matter what the weather, always bring your own sunshine." - Anthony J D'Angel


I've already put it to good use writing a list of favorite sketch inspiration sites, future title ideas and drawing out sketches of favorite layouts I find online. It's definitely better than my previous system of writing ideas/sketches on random scraps which just inevitably get lost.

Saturday, January 16, 2010

Follow Instructions Carefully

Our favorite train station hosts a monthly family day and this weekend they had some folks from Lowe's to share their "Build & Grow" project. Today we got to make firetrucks. By "we" I mean "mommy" and by firetrucks I mean I made (or attempted) four of them. I thought I was doing pretty well jumping back and forth helping Cali & D with each step. There were tiny nails to put in tiny holes and big hammers to pound them in with. Not much an almost 3 and a 4 year old could really do. They helped where they could but it was truly minimal. So I got all the way to the part where I have my axle in and discover I had put on the entire bottom piece upside down, there was no hole for the axle to go into. Also I forgot to align the holes for the hose reel. And the bumper and siren got mixed up (although that wasn't entirely my fault). Long story short they gave me two more kits to start over on. I decided to pay better attention and maybe glance at the instruction sheet a bit more. Third times a charm right? Nope, I put the side piece on the wrong way again. Kids have completely lost interest and are exploring the exit and fire alarm (ok just Diego did that). I go ask if I can pry off the side, they offer me another new kit. I say no thanks, I'm already on my 3rd one. I manage to pry off the side and attempt to re-attach it properly. My nail goes through the bottom. I give up on that one. I start over and figure they can just share this one if I ever manage to not screw it up. My dear friend Dana comes to the rescue, hers is done and she salvages my #3. I finally manage on the fourth try to produce a decent fire truck. Kids are happy, I've learned my lesson.